Here are best 10 Canva hacks tips tricks to Help You Use Canva Photo Editor More Effectively. With these tips, you can get the most out of Canva and make more eye-catching, polished designs. Canva Photo Editor is the go-to tool for creating rewarding experiences when navigating the world of digital design. Learning Canva can change your creative process, whether you are a novice or an experienced designer.
What’s in this article?
What is Canva?
Canva is a user-friendly graphic design platform renowned for its simplicity and versatility. Launched in 2012, it caters to both amateurs and professionals, offering tools for creating diverse visual content like social media graphics, presentations, and posters. Discover design brilliance with these canva hacks tips tricks. Canva is available for designing while on the go thanks to its mobile apps and web-based interface. It is perfect for personal, academic, or professional projects because it has an extensive library of templates and design elements.
10 Canva Hacks Tips Tricks to Better Use Canva Photo Editor
Explore the endless possibilities and transform your designs with the expertise hidden within these invaluable Canva hacks and discover design brilliance with these canva hacks tips tricks.
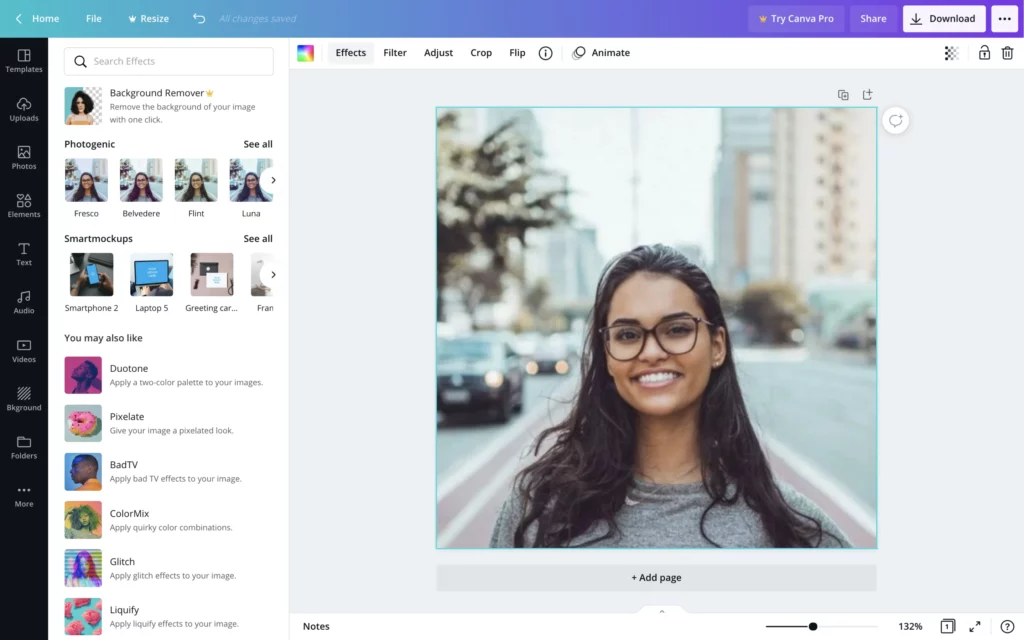
1. Remove Background with Ease
- Step 1: Select your image in Canva.
- Step 2: press on the ‘Effects’ button.
- Step 3: Select the ‘Background Remover’ tool.
- Step 4: Fine-tune the borders if required.
- Application: Perfect for creating product images or professional headshots.
The Canva Photo Editor simplifies background removal, transforming any image into a clean, professional-looking visual. This feature is especially useful for creating product images, headshots, or any design where focus is key. Start by uploading your image, then use the ‘Background Remover’ tool. Canva’s AI efficiently separates the main subject from the background. This tool is a game-changer for both novice and experienced designers, offering a quick way to elevate the visual appeal of your designs.
2. Quick Filter Application
- Step 1: Upload your photo to Canva.
- Step 2: Click on the photo and select ‘Filter’.
- Step 3: Browse or search for filters.
- Step 4: Apply the chosen filter and adjust its intensity.
- Impact: Instantly enhance the mood and style of your photos.
Designing brilliance with these canva hacks tips tricks, filters in the Canva Photo Editor are powerful tools for enhancing the mood and aesthetic of your images. With a vast array of options, the quick search function is invaluable. It allows you to easily find and apply the perfect filter to match your design’s tone. Whether you’re looking for something vintage, vibrant, or subdued, the Canvas filter library caters to all. This feature saves time and helps you maintain consistency across your designs.
3. Adding Text to Images
- Step 1: Select the ‘Text’ tool in Canva.
- Step 2: Choose from various fonts and styles.
- Step 3: Type your message and adjust the size and color.
- Step 4: Position the text for maximum impact.
- Effectiveness: Make your images communicative and engaging.
Adding text to images in Canva is a seamless experience. With a wide variety of fonts and customization options, you can convey your message effectively. Whether it’s a bold headline or a subtle caption, the right text can significantly boost your design’s impact. Experiment with font sizes, styles, and colors to match your brand or message’s tone. Remember, the placement of text is crucial; it should enhance the image, not overpower it.
4. Frame Your Images
- Step 1: Upload your photo to Canva in Step 1.
- Step 2: Select “Frames” after selecting “Elements”.
- Step 3: Place your image inside the framework by dragging it in.
- Step 4: Change the position as necessary.
- Usage: Add a polished look to your photos.
Frames are a fantastic way to add structure and emphasis to your images in Canva. Whether you’re framing a photograph or a graphic element, the right frame can transform the overall look of your design. Canva offers a diverse selection of frames, from simple borders to more artistic styles. This feature is particularly useful for creating cohesive visual content for social media or marketing materials.
Also Read : Discover these Canva Hacks Tips Tricks! How to Edit Photos Like a Pro in Canva?
5. Create Engaging YouTube Thumbnails
- Step 1: Choose the YouTube thumbnail template in Canva.
- Step 2: Upload your image or select from Canva’s library.
- Step 3: Add text and elements to capture attention.
- Step 4: Save and download your thumbnail.
- Importance: Increase click-through rates for your videos.
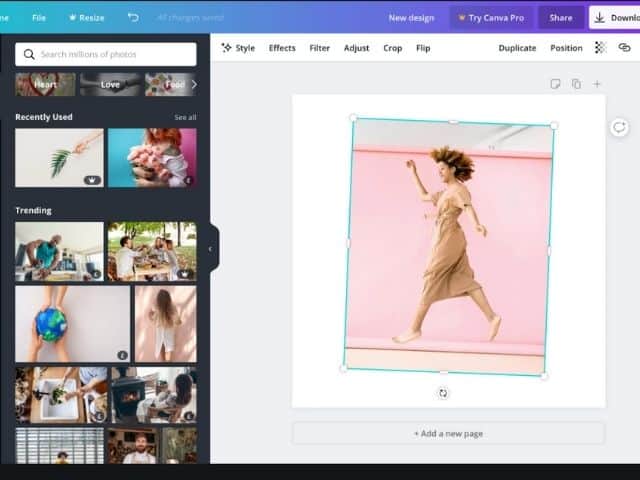
A captivating YouTube thumbnail can make all the difference in video engagement. Canva Photo Editor provides tools to design thumbnails that stand out. Focus on combining eye-catching imagery with bold text to grab attention. Remember, your thumbnail should give a clear idea of what your video is about while enticing viewers to click. Use Canva’s vast library of templates as a starting point and customize them to suit your content.
6. Enhance with Elements
- Step 1: Select ‘Elements’ in the Canva toolbar.
- Step 2: Browse or search for icons, shapes, and stickers.
- Step 3: Add and customize elements in your design.
- Step 4: Layer and combine elements creatively.
- Creativity: Elevate your designs with unique combinations.
Canva’s vast library of elements, ranging from icons and shapes to stickers and grids, can add depth and creativity to your designs. You can use these elements to make your images more complex, more emphasized, or both. The secret is to use them sparingly because an excessive number of elements can make your design look cluttered. Choose elements that complement your message and brand style for maximum impact.
7. Crafting Photo Collages
- Step 1: Select a collage template in Canva.
- Step 2: Upload your photos.
- Step 3: Drag and drop photos into the template.
- Step 4: Adjust borders and layouts as needed.
- Application: Perfect for storytelling or visual summaries.
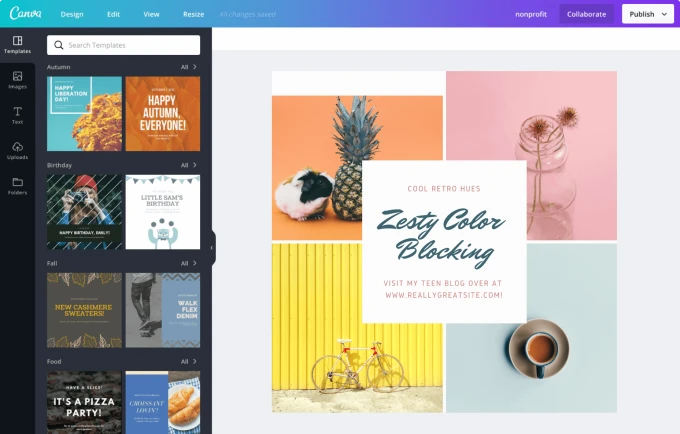
Creating a photo collage in Canva is a fun way to tell a story or showcase multiple images in a cohesive layout. With various templates and customization options, you can arrange your photos creatively. Whether it’s for a personal project or a professional presentation, a well-designed collage can effectively convey your narrative. Experiment with different layouts and frames to find the perfect arrangement.
8. Designing Professional Mockups
- Step 1: Choose a mockup template in Canva.
- Step 2: Upload your design or image.
- Step 3: Adjust the design within the mockup setting.
- Step 4: Customize the background and elements for realism.
- Use Case: Showcase designs in real-world scenarios.
Designing mockups in Canva is a straightforward process that can elevate your product or digital designs. Mockups can provide a realistic representation of how your designs would appear in real-world settings. This is particularly beneficial for entrepreneurs and designers presenting their work to clients. Canva offers various mockup templates, from device screens to physical products, making it easy to find the right context for your designs.
9. Focus and Blur Techniques
- Step 1: Upload your photo to Canva.
- Step 2: Select the photo and choose ‘Effects’.
- Step 3: Apply ‘Blur‘ and adjust its intensity.
- Step 4: Use ‘Crop’ and ‘Focus’ to highlight areas.
- Effect: Draw attention to key areas of your photo.
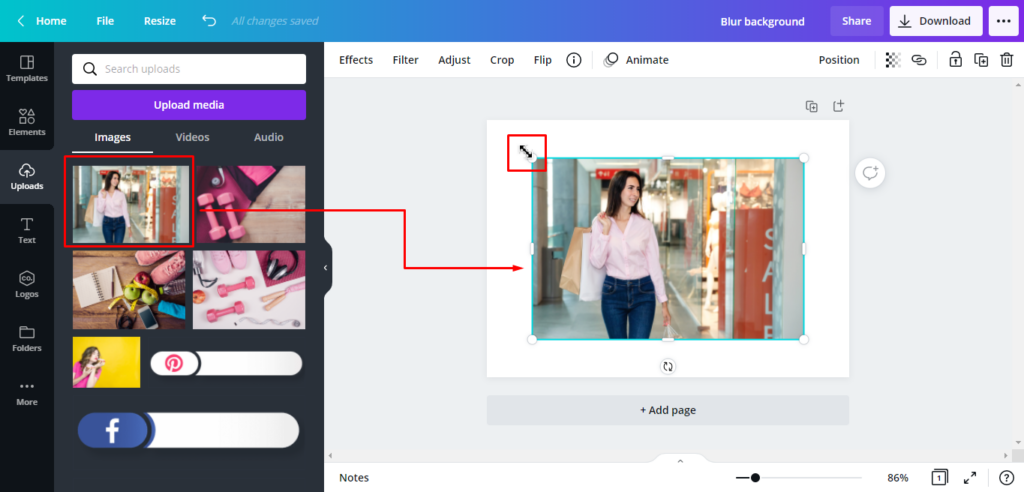
The Auto Focus and Blur tools in Canva are excellent for adding depth and focus to your images. Use Auto Focus to highlight the main subject of your photo, making it stand out. Conversely, the Blur tool can be used to soften backgrounds, reduce distractions, and make your focal point more prominent. These tools are particularly useful in portrait photography or product showcasing.
10. Mastering Color Mixes
- Step 1: Open your design in Canva.
- Step 2: Select an element or text.
- Step 3: Click on the color tool and experiment with combinations.
- Step 4: Apply the color scheme to your design.
- Impact: Create visually appealing and harmonious designs.
Color mixing in Canva can dramatically change the mood and aesthetic of your design. With an intuitive color wheel and custom color palettes, Canva allows you to experiment with different hues and combinations. Understanding basic color theory can help you create visually appealing designs. Use contrasting colors for vibrancy or complementary colors for harmony. Discover design brilliance with these canva hacks tips tricks. This tool is essential for branding, marketing materials, and any design where color plays a key role.
Also Read : Canva vs. Photoshop: Which Photo Editor is Best for Marketing Managers?
Bonus Canva Hacks Tips Tricks
Center Align Text
Perfect center alignment in Canva can add a professional touch to your designs. It’s key for symmetry and balance in layouts. Canva’s alignment tools make it easy to center text, ensuring it’s the focal point when needed. This feature is crucial for creating impactful headlines or when text needs to stand out against a busy background. Utilize grid lines and alignment guides to achieve precise centering, enhancing the overall aesthetic of your design.
Select an Element That’s Behind Another Element:
Canva’s layer management allows you to select and edit elements hidden behind others. This is essential for complex designs where multiple layers are involved. Use the ‘Position’ tool to bring elements forward or send them back, and ‘Layers’ to view the stack of elements. This feature is especially helpful when working with intricate designs, allowing you to manipulate each component without disrupting the entire layout.
Curve Your Text:
Curving text in Canva adds a creative twist to your designs. It’s perfect for logos, circular designs, or whenever you want to break away from straight lines. Experiment with different arc sizes to match the design’s mood. Curved text can guide the viewer’s eye around the image, adding dynamism and interest.
Lock or Group Elements:
Locking and grouping elements in Canva are essential for maintaining your design’s integrity. Use the ‘Lock’ feature to secure elements in place, preventing accidental modifications. Grouping allows you to move or edit multiple elements simultaneously, maintaining their relative positions. This is especially useful in complex designs or when working with templates.
Share your design with team members:
Canva’s collaborative features enable you to share designs with team members, enhancing productivity and creativity. Utilize sharing options to work on projects simultaneously or gather feedback. Canva’s cloud-based platform ensures all changes are updated in real-time, making it ideal for team projects and ensuring consistency across designs.
Create Canva Websites:
Creating websites in Canva is straightforward. Begin with a template and customize it with your images, text, and elements. Canva’s drag-and-drop interface makes it easy to design professional-looking websites without coding knowledge. Pay attention to layout, color schemes, and font choices to ensure your website is both functional and aesthetically pleasing.
Also Read : Canva Review: Everything You Need to Know!
Make Your Designs Pop with Smart Mockups:
Smart mockups in Canva bring your designs to life by placing them in real-world scenarios. From device screens to billboards, mockups provide a realistic preview of how your designs will look. This is invaluable for client presentations or evaluating the effectiveness of your design in a practical context.
FAQs: Canva Hacks Tips Tricks
Q1: Are designs created in Canva mobile-friendly?
A1: Yes, designs created in Canva are mobile-friendly. Canva also offers a mobile app, allowing users to create and edit designs on mobile devices seamlessly.
Q2: How can I collaborate with others on a Canva project?
A2: Canva supports real-time collaboration. You can share your design with team members or clients and grant them editing or viewing access. This feature facilitates teamwork and feedback sharing.
Q3: Does Canva allow printing services for designs?
A3: Yes, Canva offers printing services for various designs, including business cards, flyers, and posters. You can design in Canva and have the final product delivered to your doorstep.
Q4: How secure is Canva for storing personal designs?
A4: Canva takes user security seriously and employs various measures to protect your designs and personal information. However, it’s always recommended to keep backups of important designs for added security.
Q5: Can I integrate Canva with other tools and platforms?
A5: Yes, Canva integrates with various platforms, including social media channels for direct posting and cloud storage services for easy access to files.
Q6: Are there educational resources available for learning Canva?
A6: Canva offers a comprehensive range of educational resources, including tutorials, webinars, and design courses, suitable for all skill levels.
Conclusion: Canva Hacks Tips Tricks
In conclusion, the effective utilization of Canva’s extensive features, ranging from basic functionalities to advanced techniques, is pivotal in enhancing the quality and impact of your design endeavors. It is advisable to regularly acquaint oneself with the latest updates and features introduced by Canva, as these often incorporate new tools and enhancements that can significantly streamline the design process. The journey with Canva transcends mere proficiency in a digital tool; it encompasses the unlocking of creative potential and the adept transformation of conceptual ideas into visually compelling narratives.

